Onboarding with AppsOnAir
Getting started with AppsOnAir is simple and fast. Create your workspace, add your apps, and share builds with your team or clients in just a few clicks.
Setup AppsOnAir Account
-
You need to login to AppsOnAir using your email id.
-
If you are accessing first time and creating an independent account, you will need to create your workspace. If you have been invited to join an existing workspace, you will be redirected to the AppsOnAir dashboard.
-
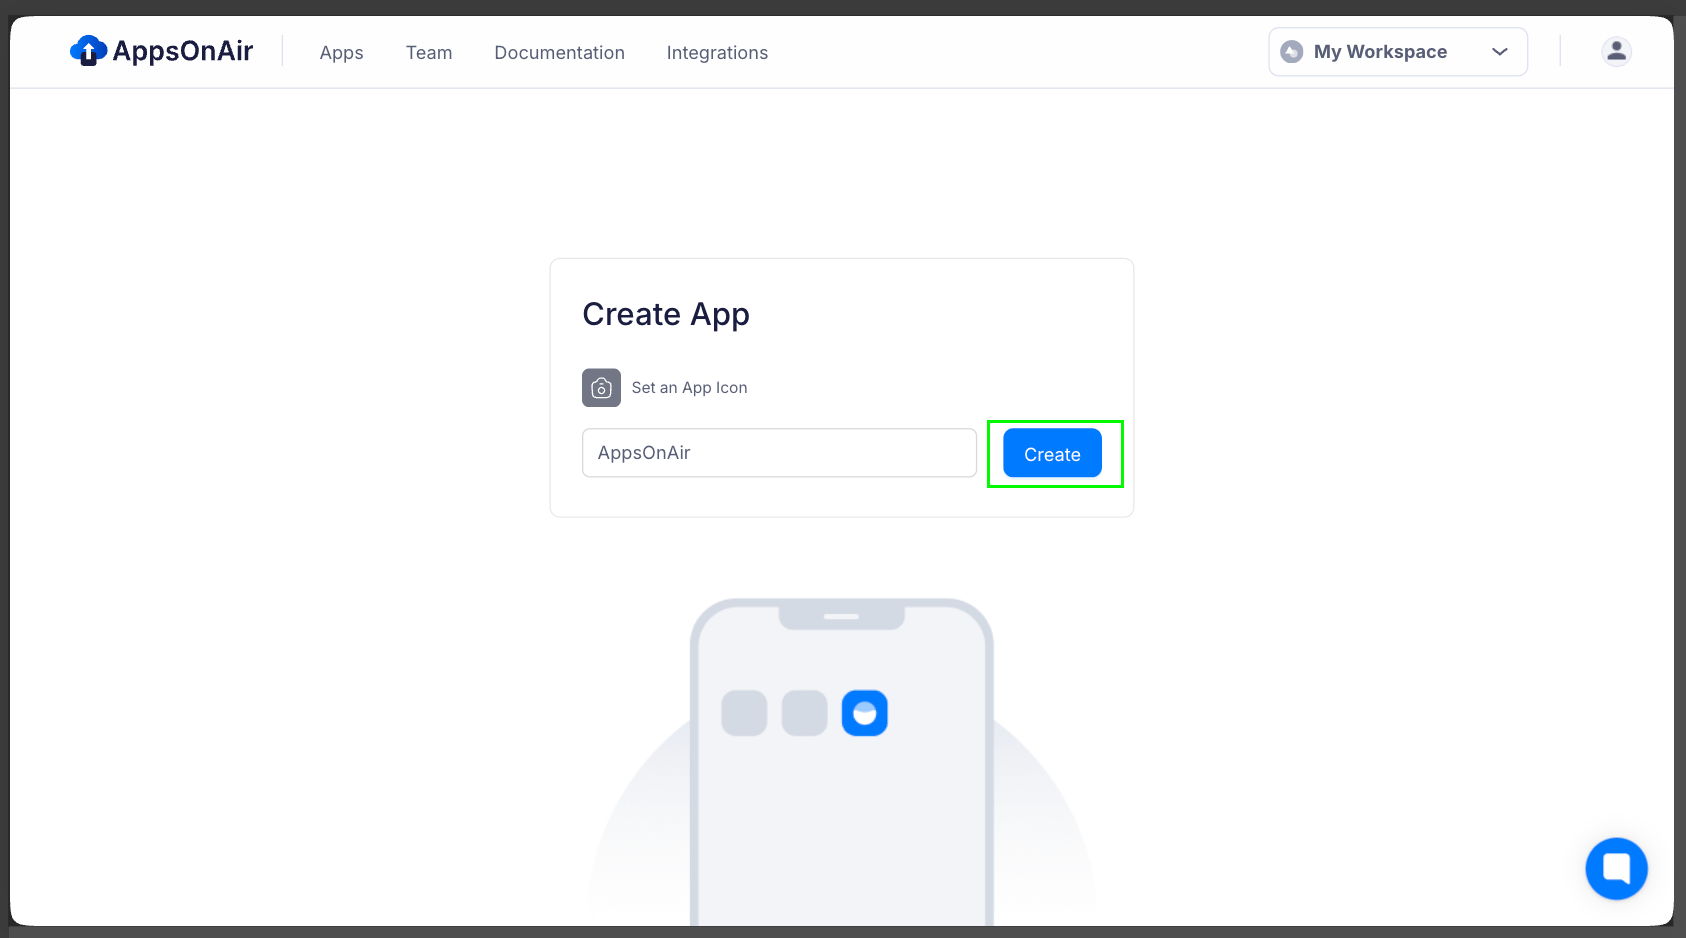
Create an app with a name and logo/image. Your created app will now be visible on the AppsOnAir dashboard.
-
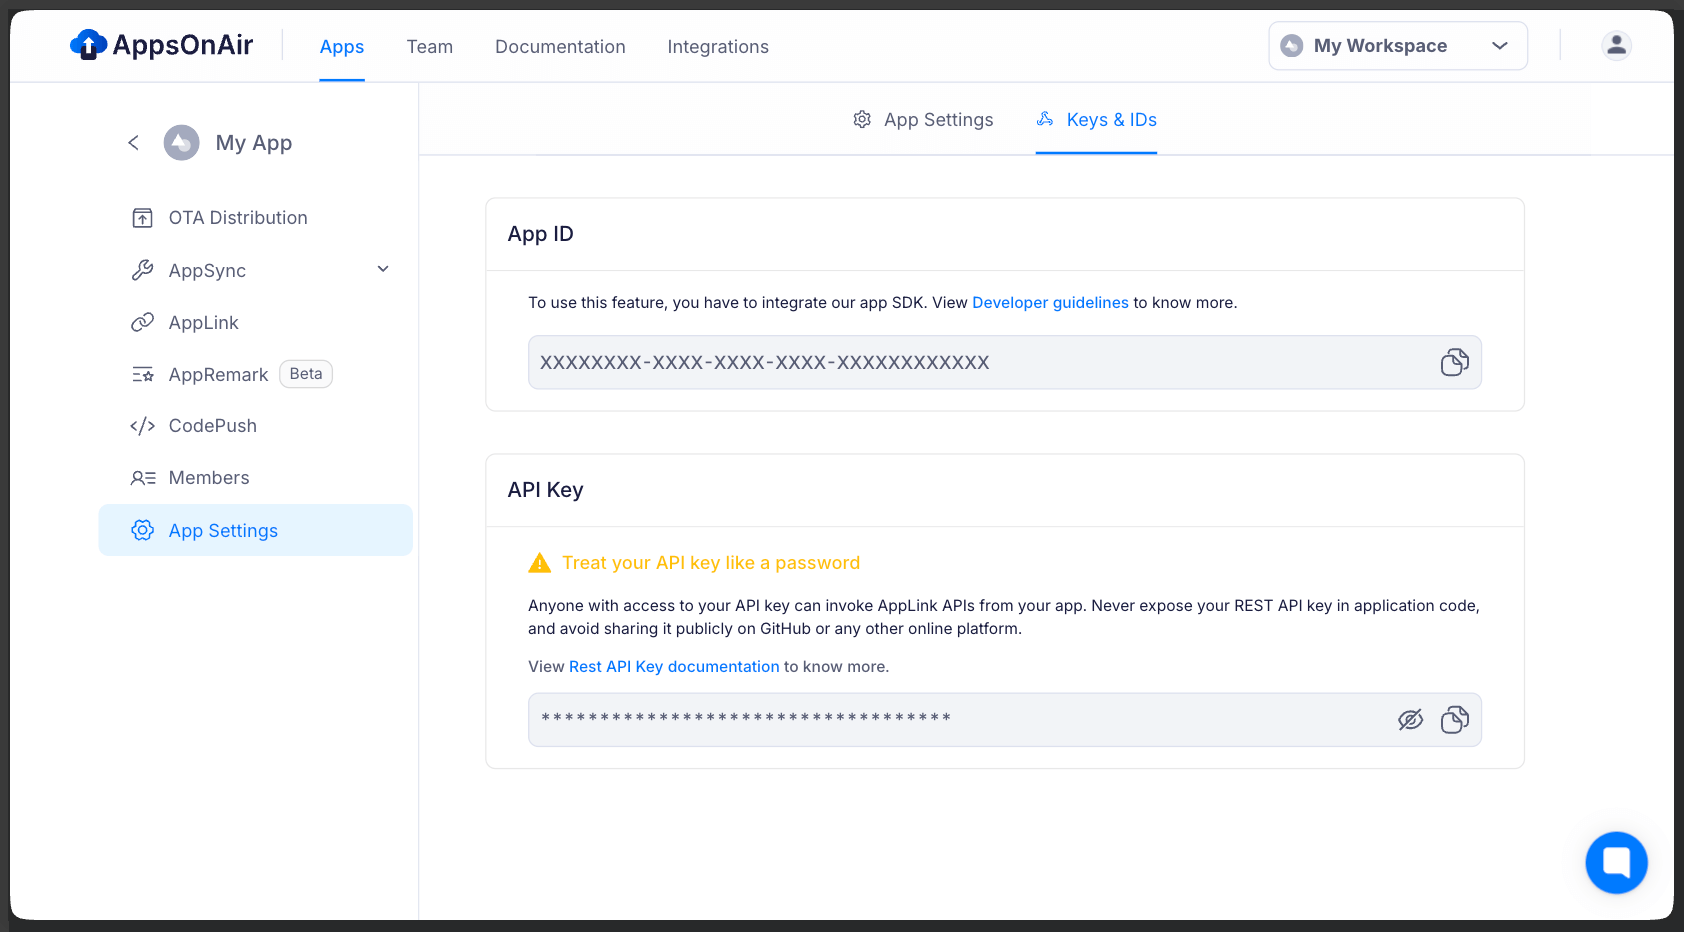
Click on your app card and go to the App Settings.
-
Go to the Keys & IDs tab under App Settings, copy and use the App ID in your SDK integration.
Workspace
A Workspace in AppsOnAir is a dedicated space where you can manage multiple apps within the same organisation.
- You can't change the workspace name later, so make sure to choose a proper name.
- A user can be part of multiple workspaces.
- Owner and Admin can invite users to join a workspace via email.
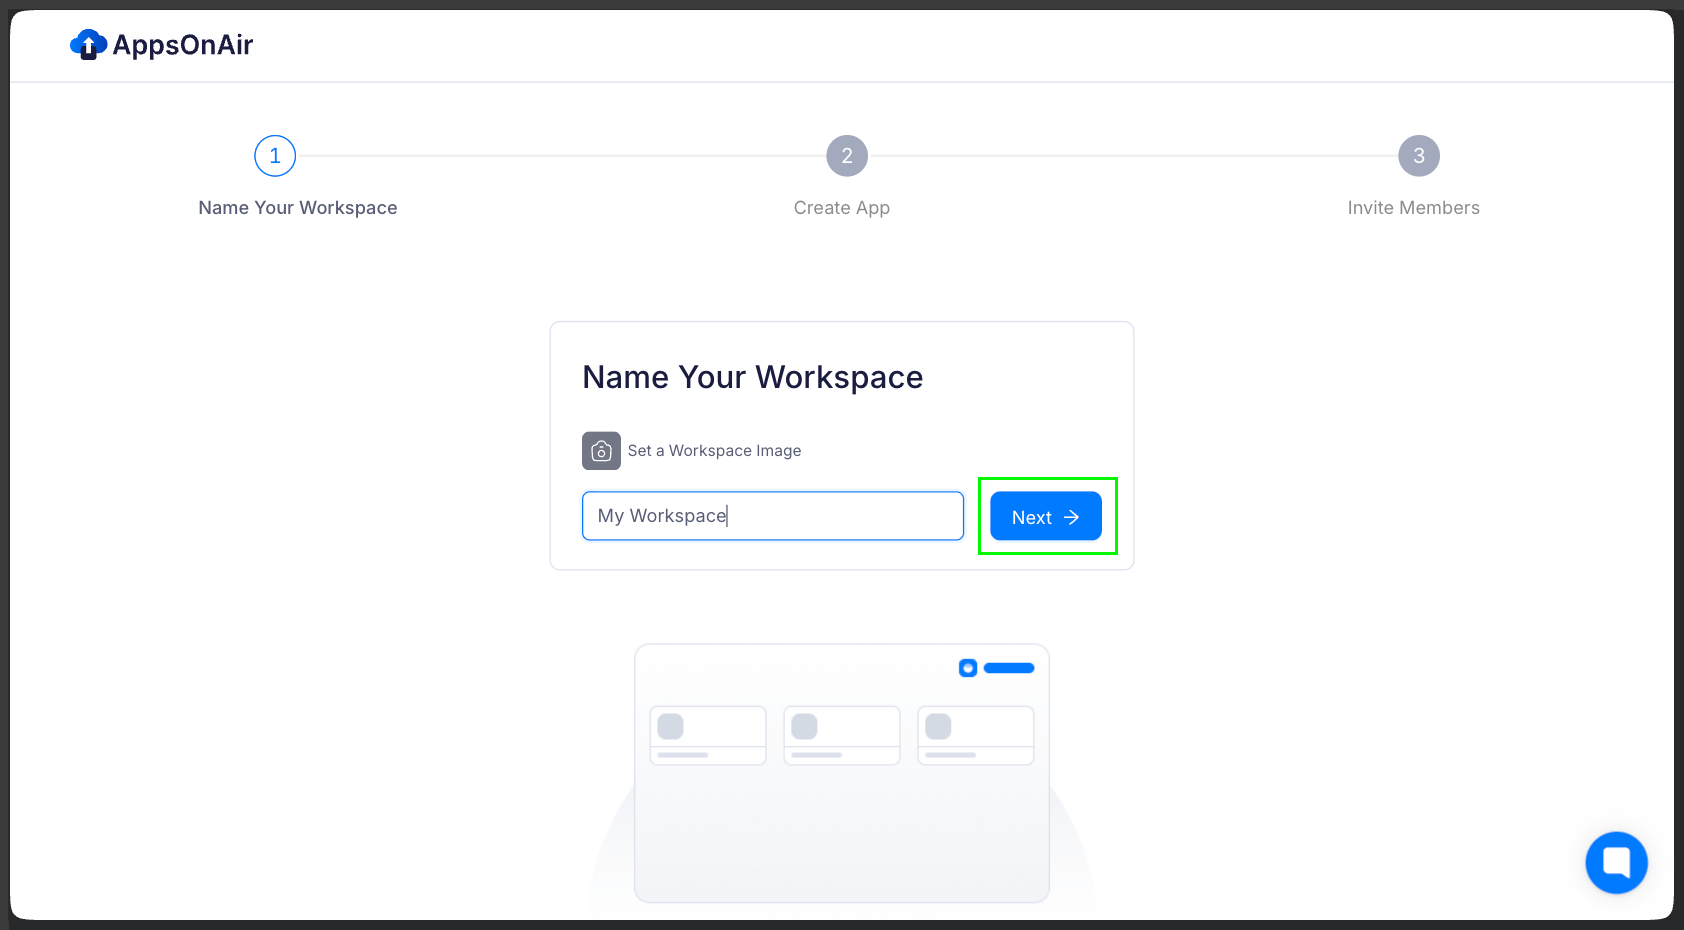
- Create Workspace: When you access AppsOnAir for the first time with your email, after entering your basic details you will be allowed to create a workspace.
Users can access multiple workspaces by accepting an invite from the Owner or Admin via email.
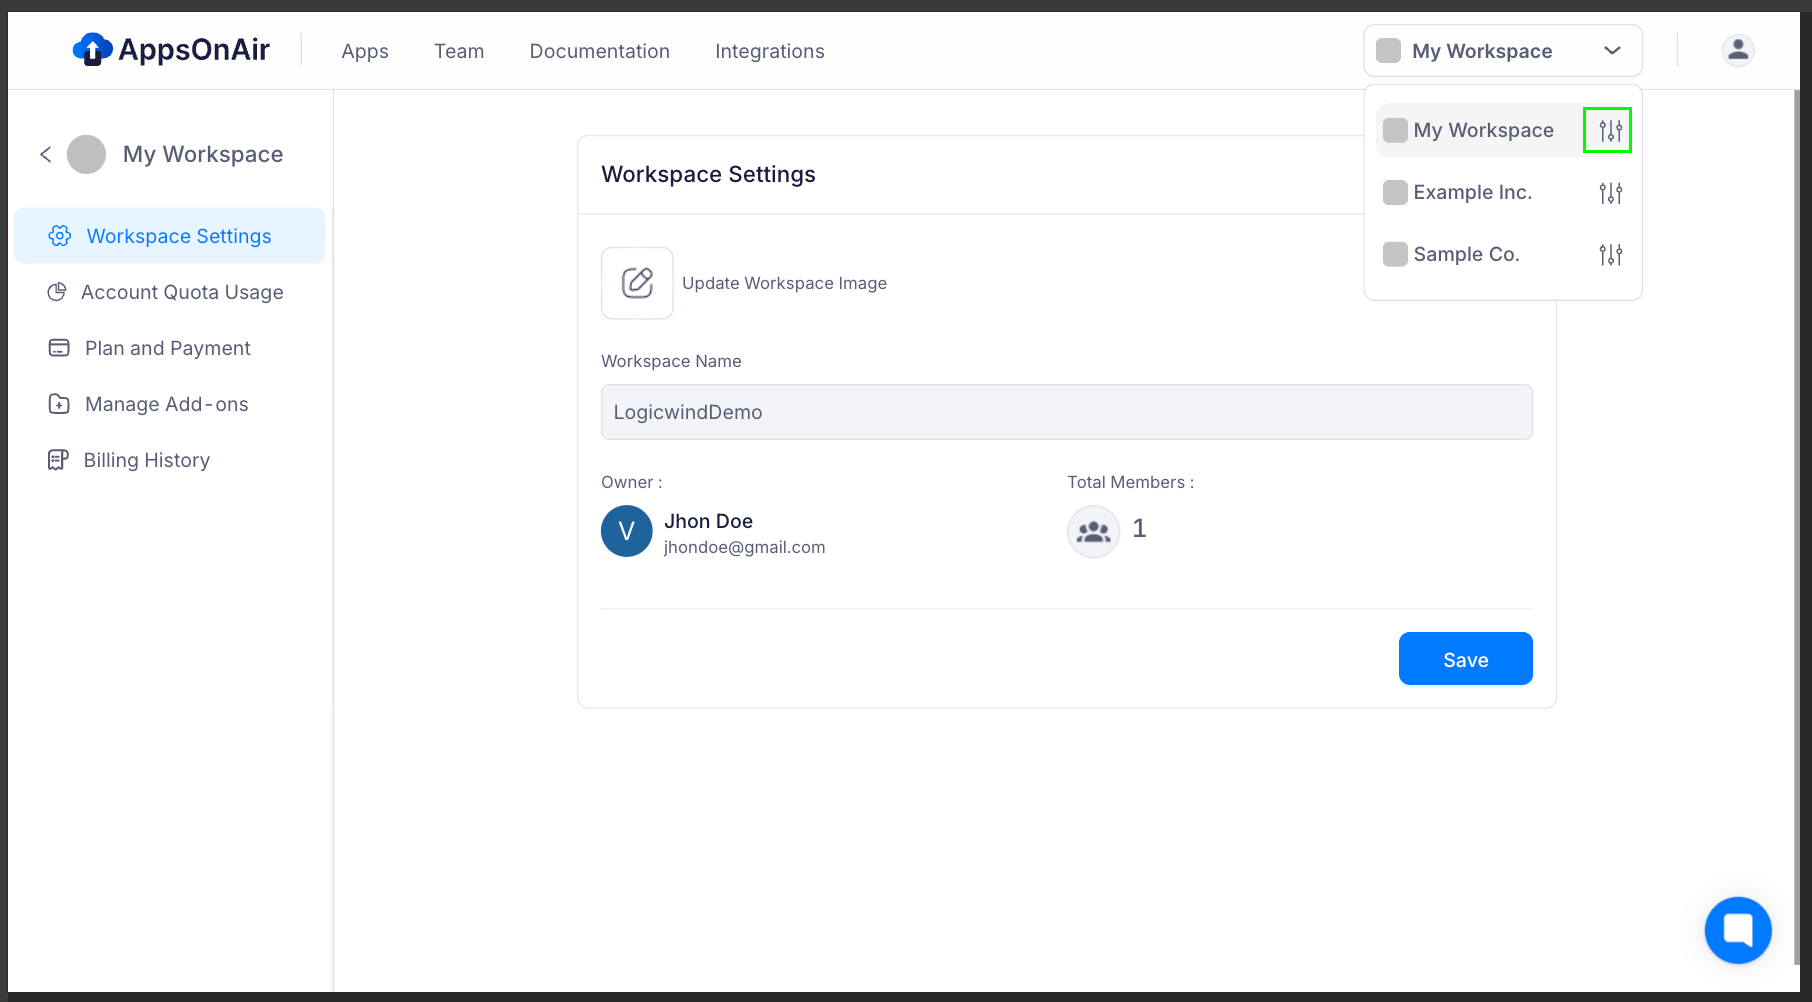
Workspace Settings
In Workspace Settings, you can update your workspace image, view the owner's email, and check the total number of members. You'll also find options to monitor Account Quota Usage, Plans and Payments, Manage Add-ons, and Billing History.
Account Quota Usage
Easily track how much of your allocated storage and usage quota is consumed. This helps you stay within limits and plan upgrades in advance to avoid interruptions.
Plan & Payment
View details of your current subscription plan and payment status in one place. You can also upgrade or downgrade plans as your expansion.
Manage Add-ons
Customize your workspace by enabling or disabling add-ons with a single click. Add-ons give you extra features to enhance productivity and flexibility.
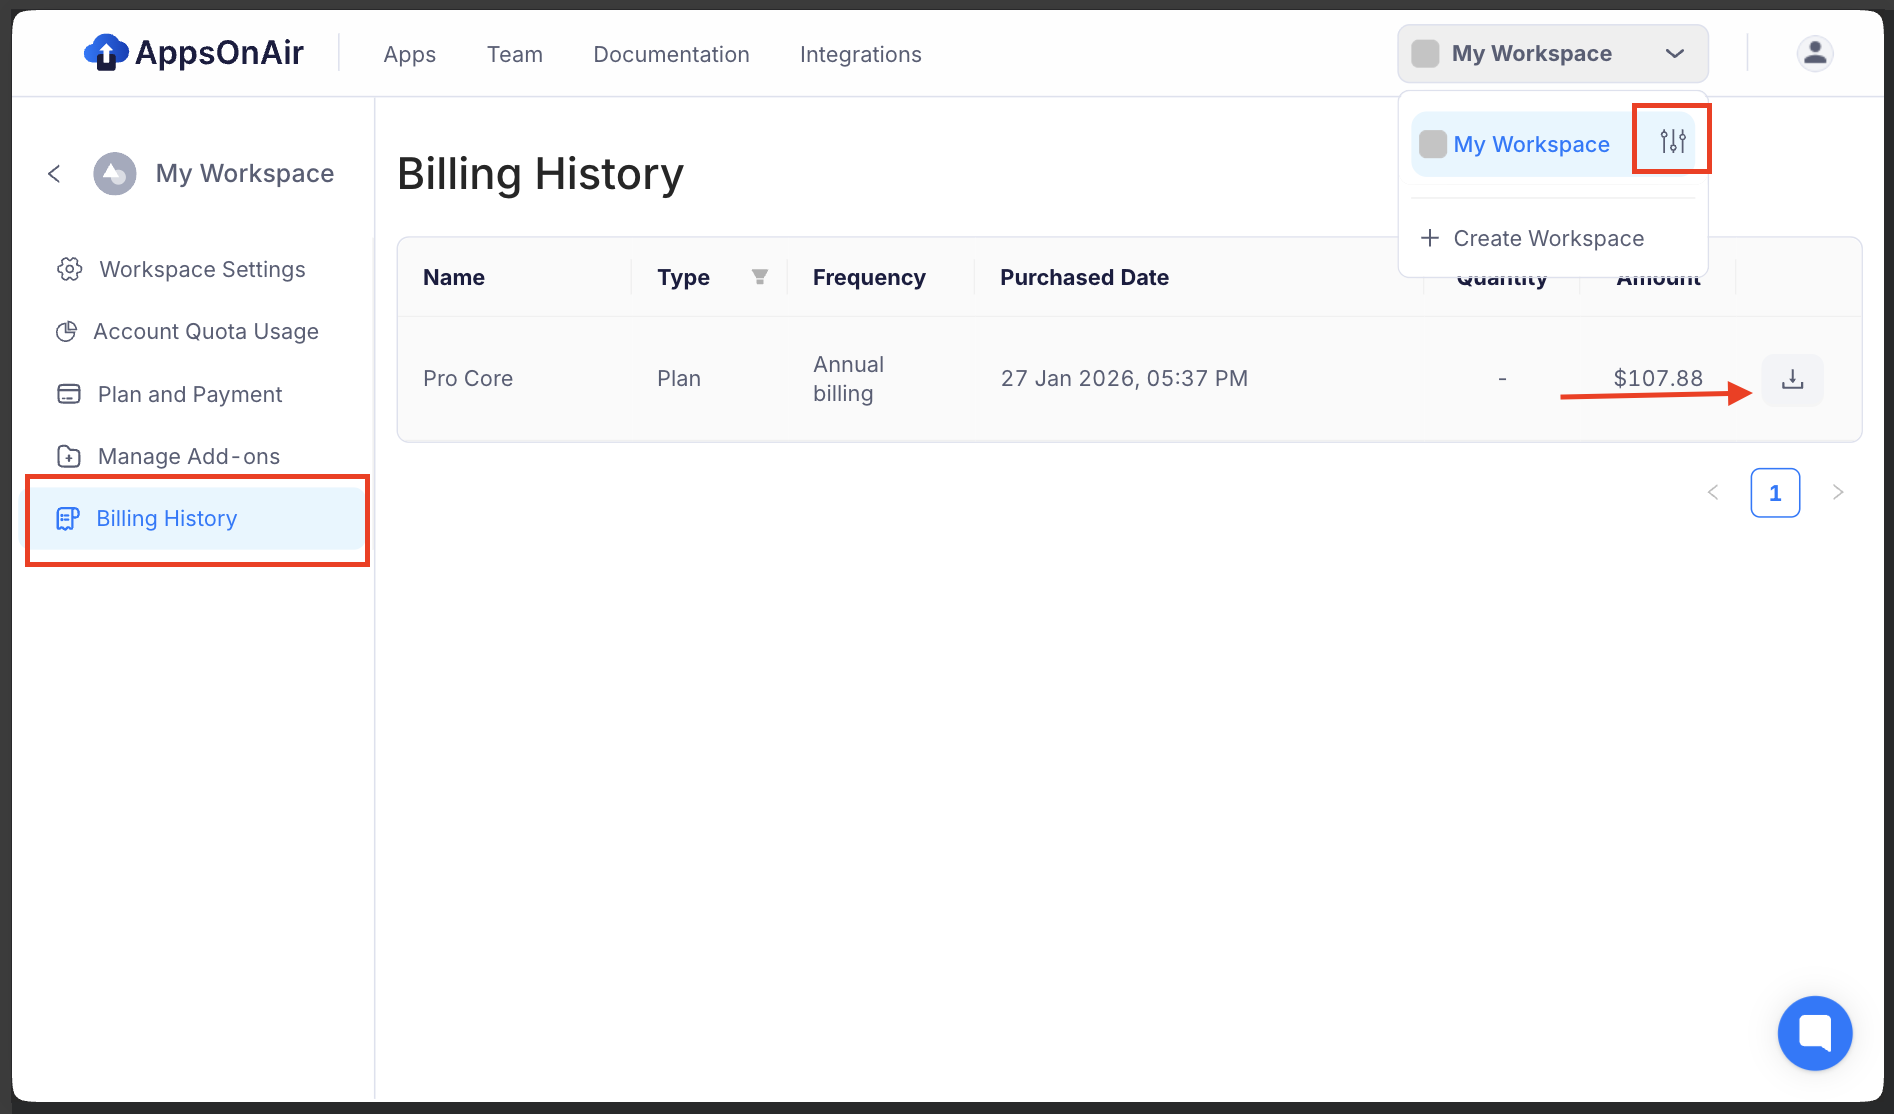
Billing History
Keep a record of all your past invoices and payments for transparency. Download receipts whenever needed for expense tracking or audits.
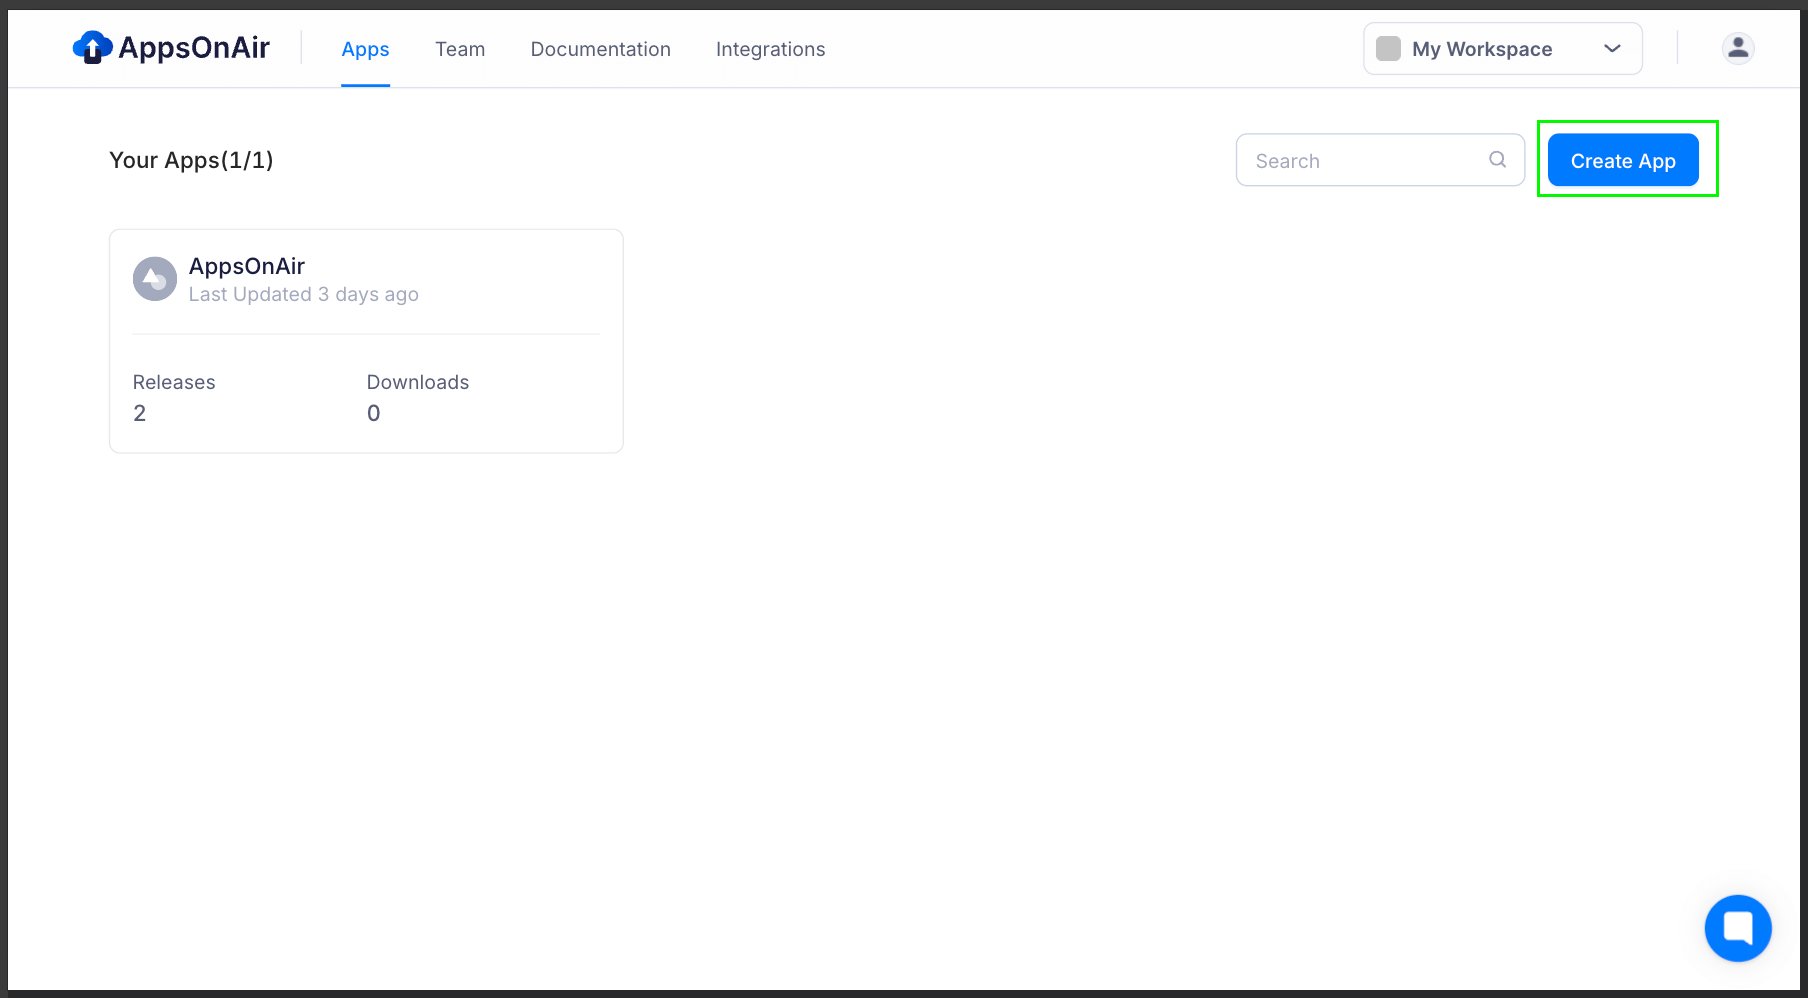
Create App
- Create App: From the dashboard, you can create a new app by clicking on the Create App action button.
- Enter the App Name and tap on Create to add the app to your workspace.
Team / Members
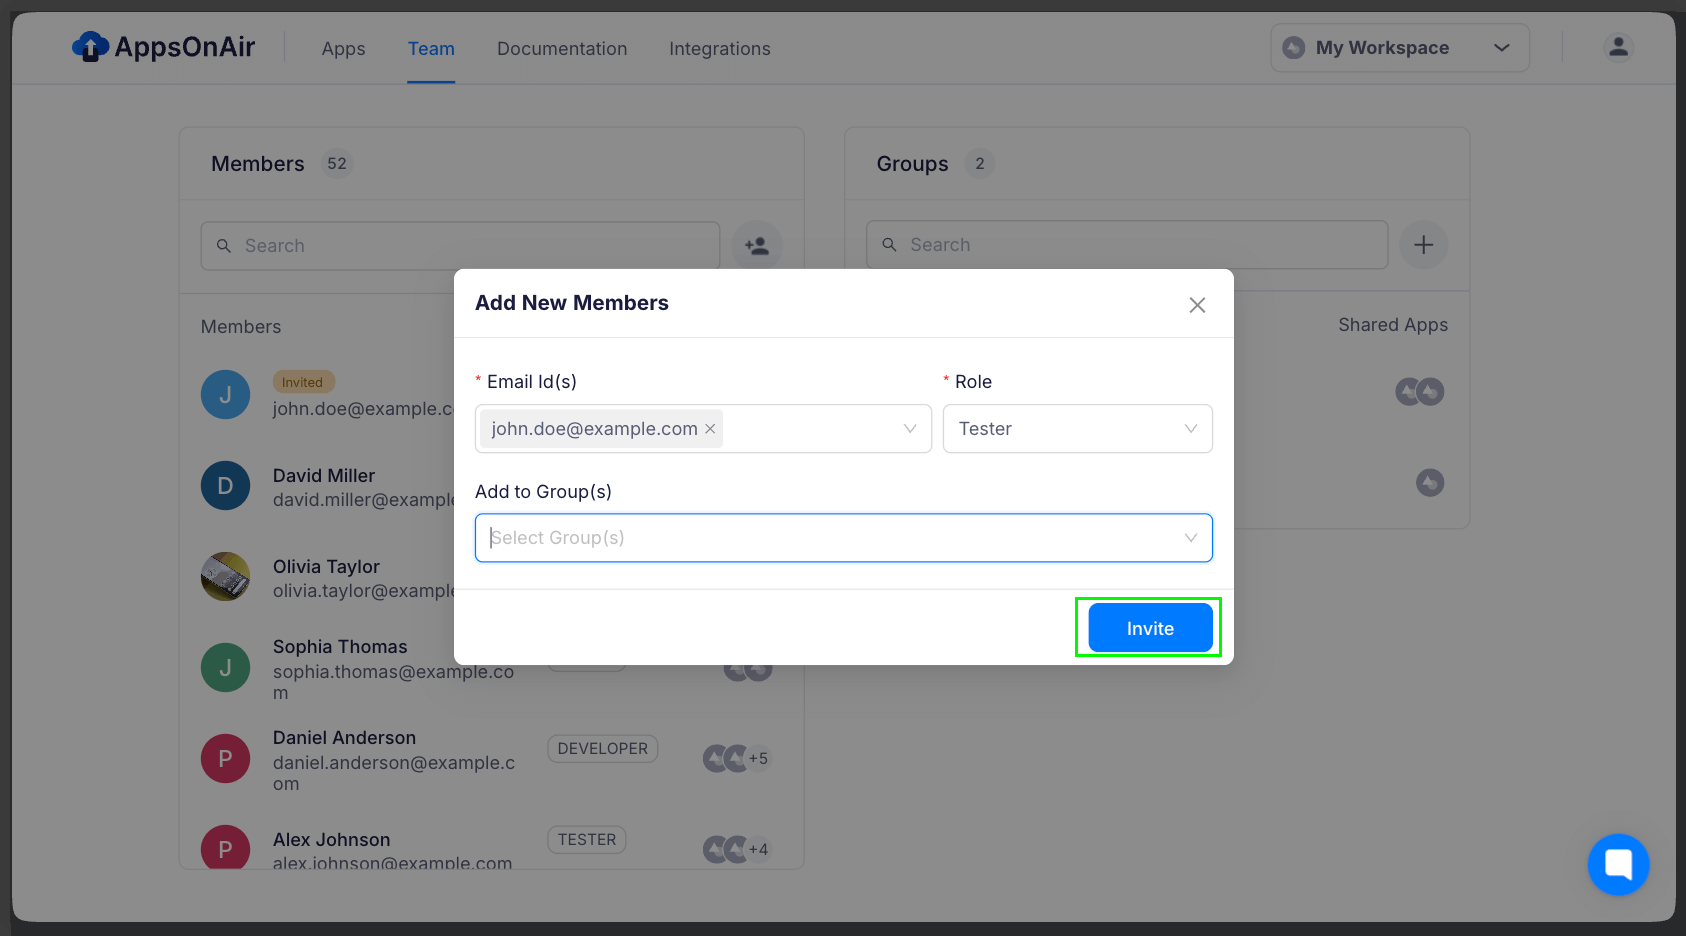
Within a workspace, you can build your team by inviting members with a specific role: Admin, Developer, or Tester.
- Invite members via email (supporting multiple emails with comma-separated input) and send invites to all selected members with a single tap.
- Create groups and add multiple members for easier collaboration and management.
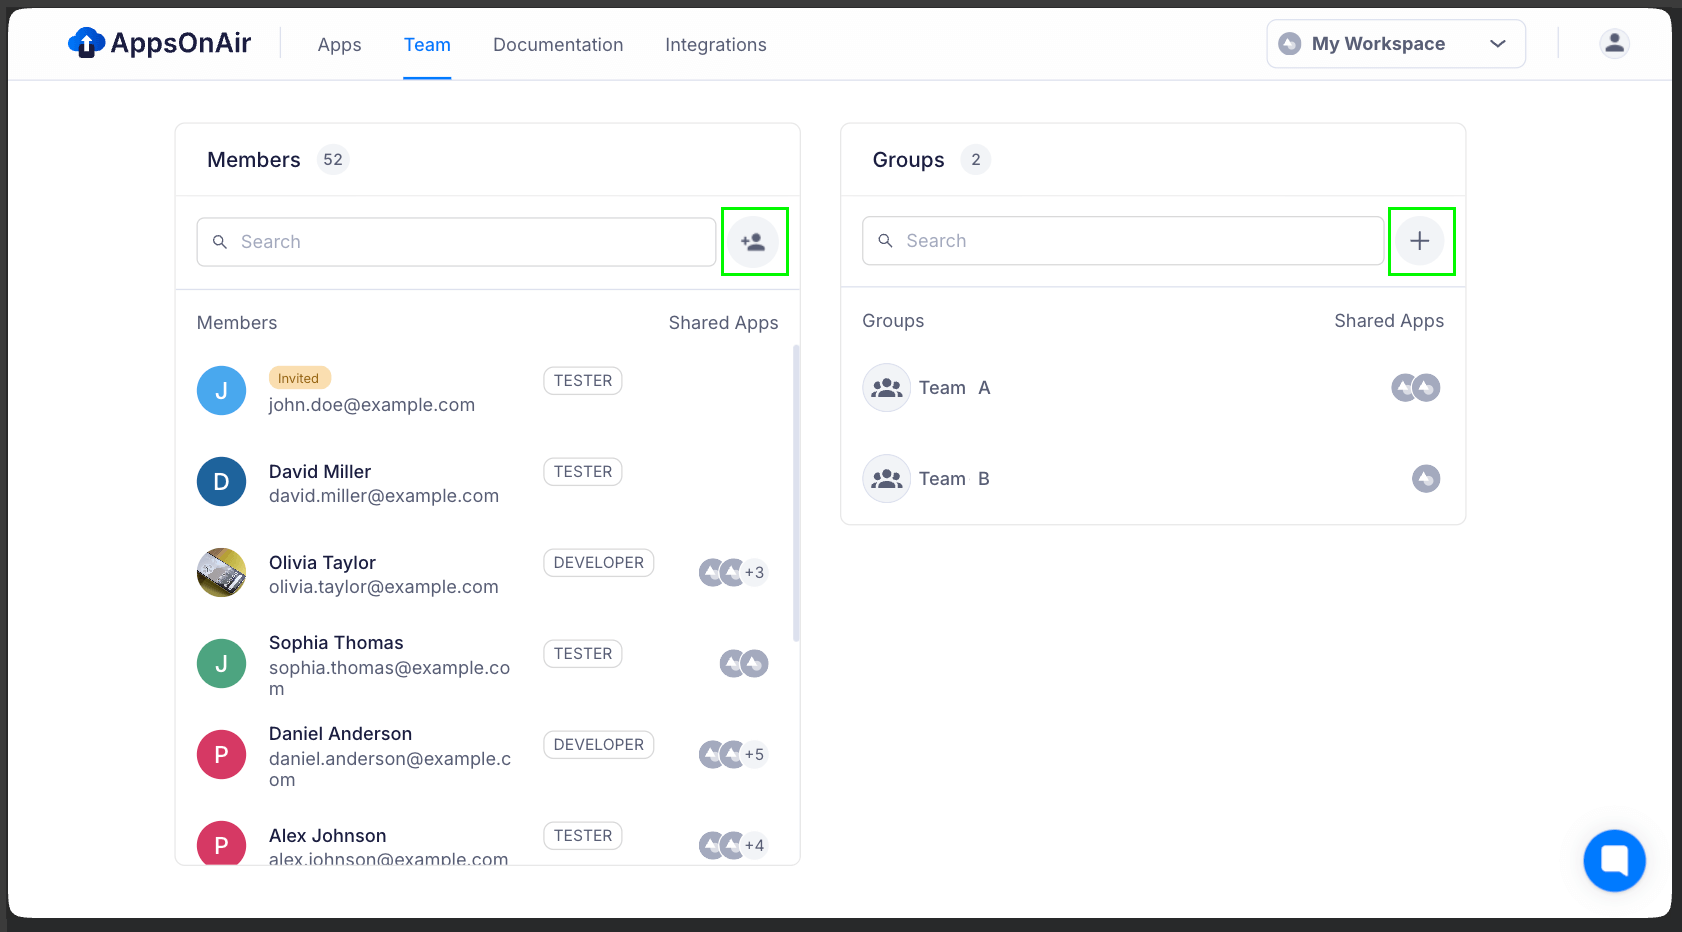
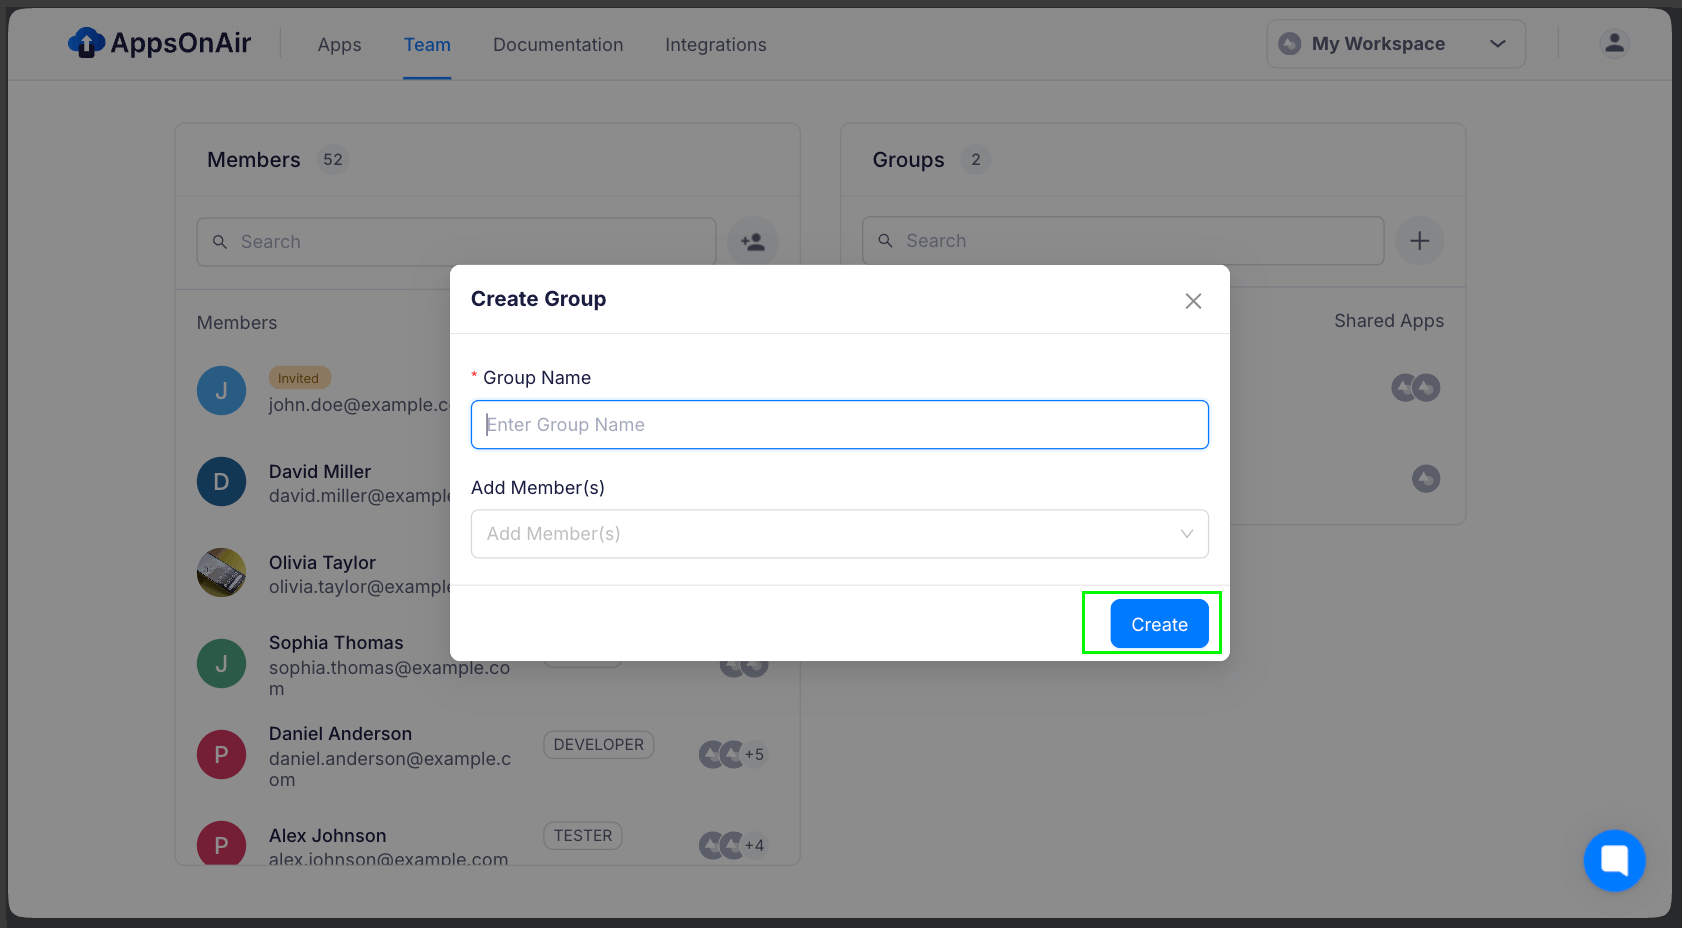
Groups
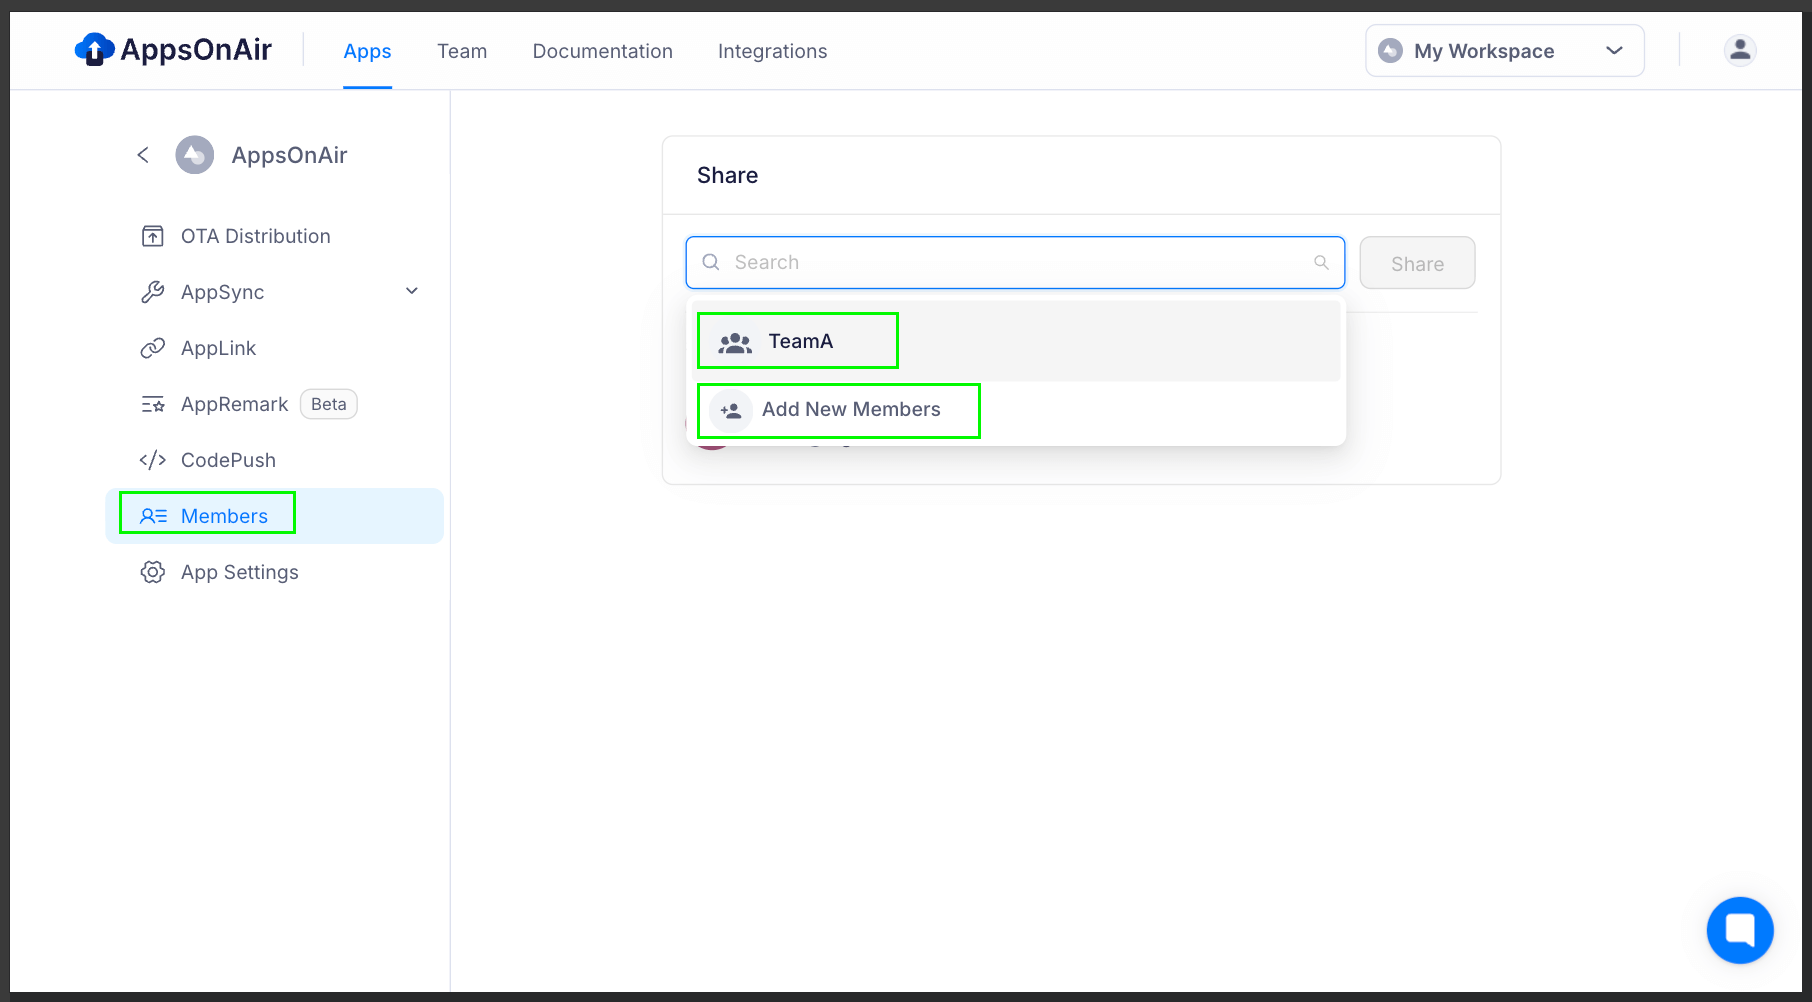
You can create groups of team members within a workspace and add these groups as members to multiple apps. This makes managing permissions and collaboration easier across projects in the AppsOnAir web portal.
When you add a new member to the group, they will automatically gain access to all the apps where that group has been added. To add group choose specific app → Members → select group, thats it group will be add for that particular app
Video Tutorial
Watch the video below for a step-by-step walkthrough. watch the full video tutorial.
FAQs
Q: What is AppsOnAir?
A: AppsOnAir is an all-in-one platform for mobile app distribution, deep linking, in-app feedback, app update management, and over-the-air (OTA) code updates — helping teams ship and manage apps faster.
Q: Do I need to create a workspace before using AppsOnAir?
A: Yes, a workspace is required. When you sign up for the first time, you'll be prompted to create one. If you've been invited to an existing workspace, you'll be taken directly to its dashboard.
Q: Can I change my workspace name later?
A: No, the workspace name cannot be changed after creation. Choose it carefully.
Q: Can I be part of multiple workspaces?
A: Yes, a single user can be part of multiple workspaces by accepting invites from Owners or Admins.
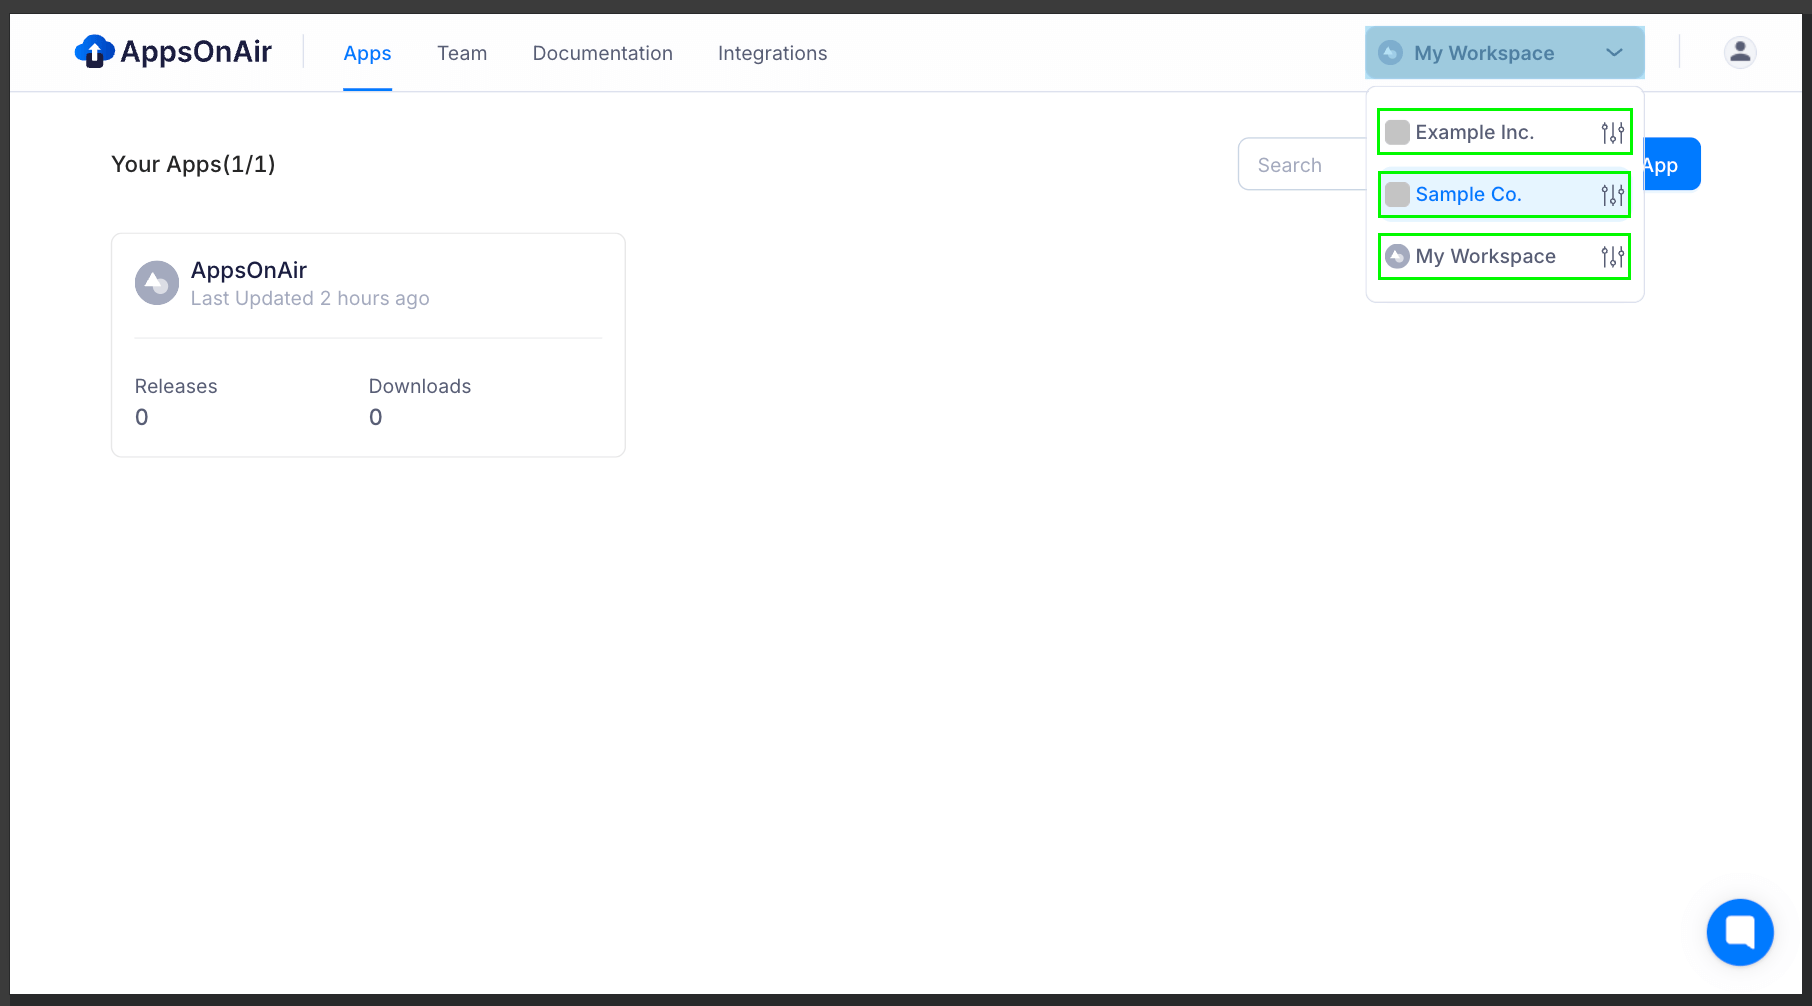
Q: How do I switch between workspaces?
A: Use the workspace switcher in the top navigation bar or side menu to switch between your workspaces.
Q: What is an App ID and where do I find it?
A: The App ID is a unique identifier for your app, required when integrating AppsOnAir SDKs. Find it under App Settings → Keys & IDs tab.
Q: Can I create multiple apps in one workspace?
A: Yes, you can create as many apps as your plan allows within a single workspace.
Q: What roles are available in AppsOnAir?
A: Owner, Admin, Developer, and Tester. Each role has different levels of access and permissions across features.
Q: What is the difference between Owner, Admin, Developer, and Tester?
A: Owner has full control. Admin can manage members and settings. Developer can upload builds and manage releases. Tester can only install and test builds.
Q: How do I invite team members?
A: Go to the Team / Members section in your workspace and invite members via email. You can add multiple emails at once using comma-separated input.
Q: What is a Group and when should I use it?
A: A Group is a collection of team members. Add a group to an app once, and all members in the group automatically get access. Useful for managing permissions across many apps.
Q: What happens when I add a new member to a group?
A: The new member automatically gains access to all apps where that group has been added — no need to manually add them to each app.
Q: How do I monitor my storage and usage limits?
A: Go to Workspace Settings → Account Quota Usage to see how much of your allocated storage and quota is consumed.
Q: How do I upgrade or change my plan?
A: Go to Workspace Settings → Plans & Payments to view your current plan and upgrade or downgrade as needed.
Q: Where can I view past invoices and billing history?
A: Go to Workspace Settings → Billing History to view and download all past invoices.
Q: How can I change my payment methods?
A: Please contact our support team at [email protected] using your registered owner role email. Make sure to include your workspace name, registered email address, and a request to update your payment method. Our team will respond to the same email and process the change within a few working days.
Q: How can I update my owner email?
A: Please contact our support team at [email protected] using your registered owner role email. Be sure to include your workspace name, current registered email address, new email address, and a request to update the owner email. Our team will respond to the same email and process the change within a few working days.